
RTMP streaming is obsolete as of end December 2020 but we keep it posted as a piece of history.
HLS adaptive streaming doesn’t work on IExplorer 11 in HTML5 mode as I discovered while testing my art site. But there is luckily a solution, namely RTMP with HLS adaptive streaming fall-back. That sounds a little odd, because you could configure HLS for Flash. But the problem is, if setup for Flash, HLS adaptive streaming won’t play on any desktop browser with Flash disabled.
And as we are in a transitional period where Flash is still allowed on browsers, while IExplorer (unfortunately) still has a significant amount of users, we best find a solution that suits both situations. While at the same time anticipating the future, which will be without Flash eventually. And that is what this tutorial is about.
For those of you already acquainted with HLS and RTMP, I suggest to jump to the next section, because now I’m going to explain what both methods (protocols) actually do:
HLS adaptive streaming vs RTMP streaming
HLS adaptive streaming has the advantage to serve video segments according to the speed of the internet connection. It will automatically serve a lighter version if it encounters mobiles, for example. This is a huge advantage. HLS can also circumvent corporate firewalls, whereas RTMP cannot.
HLS is more complex to set up then RTMP. It normally requires Flash, like RTMP, but various video players have found a way around that. In this tutorial we use JW Player 7.8.2 to demonstrate that.
Downloading HLS adaptive isn’t so difficult, but it is cumbersome because the video is broken up in pieces of 10 seconds, so that is a lot of files to deal with. In that sense, it offers more protection against illegal downloads in comparison with progressive download, which was the standard fall-back method so far.
HLS is supported on many browsers and in HTML5 mode it covers even more, including mobile devices. There are exceptions but when this protocol becomes a true standard, support will grow.
RTMP streaming has the advantage to load a little quicker and it isn’t so easy to download because the video is served piecemeal via the video card. Nothing is actually downloaded on the computer. The speed of jumping around in the timeline is more or less the same for both methods, as opposed to progressive download. Downside is: RTMP requires Flash, no matter what. Therefore, RTMP is only supported on browsers with Flash. That excludes all mobile devices and tablets. Yet, it will be perfect to show on IExplorer 11 and lower.
For those of you who have never worked with Amazon web services (AWS) and HLS, have a look at the following tutorial first so that you can prepare everything for your first HLS adaptive streaming video:
HLS adaptive streaming tutorial with CloudFront & JW Player (opens in a new tab)
And for those, who don’t have JW Player yet or never worked with it, it is recommended to follow this tutorial as well: Embed an HLS Adaptive Streaming video (opens in a new tab)
Once you have everything ready, that is to say, HLS manifests and video segments in your bucket on AWS, a web distribution and finally JW Player 7.8 or higher installed on your site, we can proceed.
By the way, RTMP is much easier to setup, so the hardest part is already done when you have followed the previous tutorials. But first we need to tweak our web distribution:
Making HLS adaptive streaming HTML5 compatible on AWS
Where in the previous tutorials HLS only works in Flash mode, in this tutorial we make sure it works in HTML5 mode. I’ll explain why further up, after we made HLS adaptive streaming HTML5 compatible, which involves setting CORS headers in the web distribution. CORS is short for Cross-Origin Resource Sharing. I’m not going to bother you with the technical details as this is a practical tutorial. You can later on look this subject up on AWS or Wikipedia.
Setting CORS headers on the web distribution
Log into https://console.aws.amazon.com
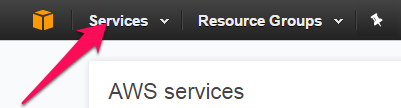
Select Services at the top-left:
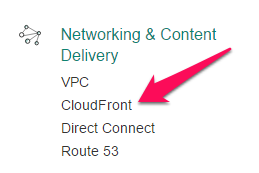
Nowadays, for CloudFront you scroll down a bit until you find Networking & Content Delivery. Select CloudFront:
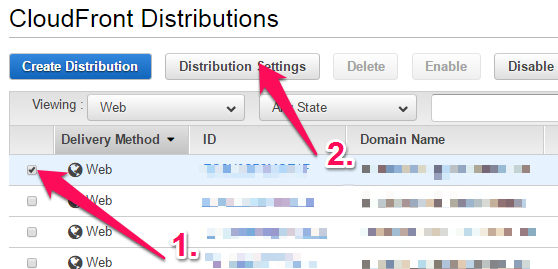
In the CloudFront distributions panel, select the web distribution to use for your HLS video (1):
 7
7
and click on Distribution Settings (2). This opens a panel with tabs:
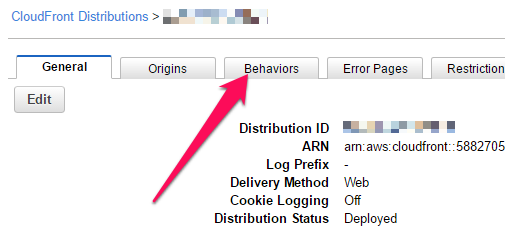
Select Behaviors. This shows a list of Behaviors. If it is the first time, you only have one.
Select it that behavior,as we are going to adapt it (1) :
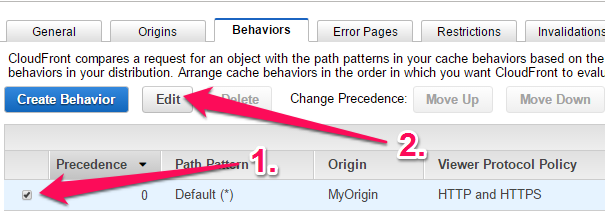
and click the Edit button (2).
This shows a lot of options. You can leave everything alone except the parts we need to tweak.
First we tweak the Allowed HTTP Methods:
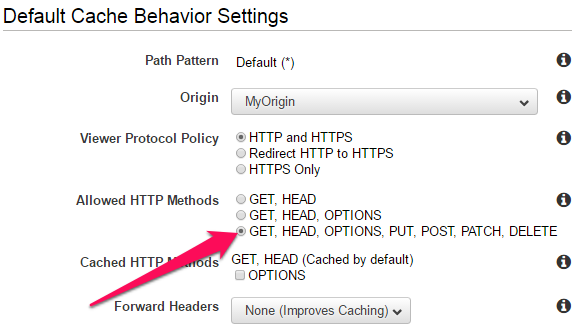
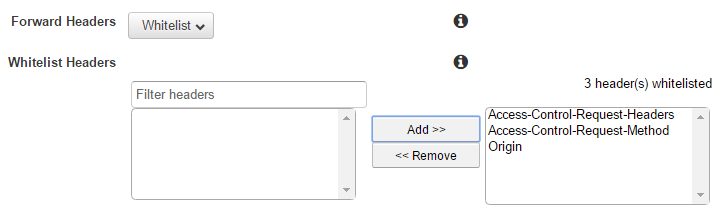
Select GET, HEAD, OPTIONS, PUT, POST, PATCH, DELETE. Then we have to set the Forward Headers.
Click on the drop down list and select Whitelist:
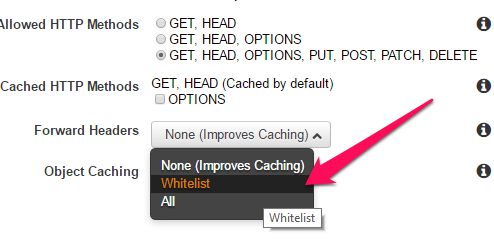
As soon as you do that, a new options list appears, namely the Whitelist Headers:
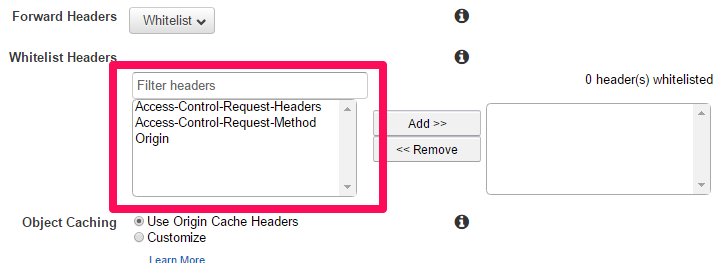
Select all options in that list and click on the Add>> button. You should now have something like this:
Now, scroll all the way down, and click the blue Yes, edit button on the right bottom.
This will take around 20 to 25 minutes before it is implemented on the web distribution.
In the meantime, we need to set CORS headers for the bucket:
Setting CORS Headers on the bucket
Go again to Services in the AWS console and select S3. This shows the list of buckets you have:
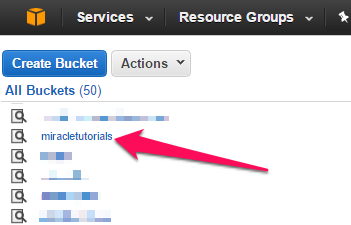
Select your bucket. And click on the Properties button:
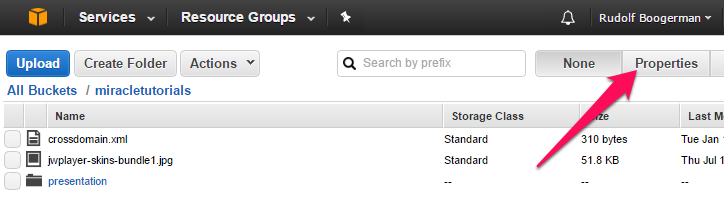
On the right you get all the possible Properties of the bucket. Select the Permissions tab:
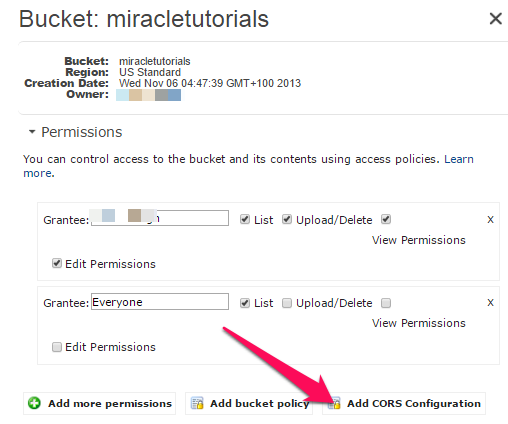
and click on the Add CORS Configuration link. This opens the Configuration editor which is already populated with an example set:

Here we need to change two things, the AllowedOrigin (1) and the AllowHeader (2). In principle, you can leave the AllowedOrigin to asterix (*), but it is better to restrict it to your own domain name instead of to everyone. Asterix means that you give access to any domain name. You can use *.yourdomain.com, yourdomain.com or https://yourdomain.com if you use a SSL certificate on your site.
Note that with an SSL certificate, the *.yourdomain.com or yourdomain.com doesn’t work. It must be the full path.
For AllowedHeader, we set this to asterix (*) so that all whitelisted headers in the web distribution get access to the bucket origin. Thus we get something like this:
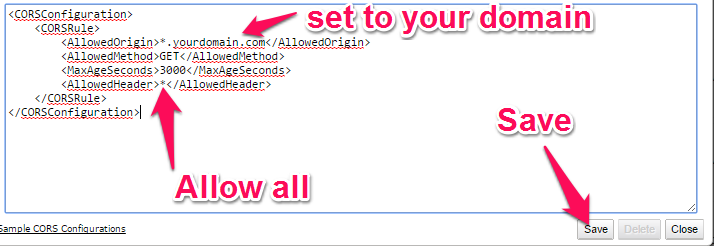
Now Save the CORS Configuration.
If you now embed the master m3u8 playlist in JW Player, you will see that it works with the Flash plugin disabled.
Further along, we will show how to embed as this is slightly different than in the previous tutorials.
But low and behold, as we have prepared the bucket up here, HLS adaptive streaming will no longer work with Flash! So, you either set no CORS headers at all and have it play in Flash only or you keep the CORS headers and have it play in HTML5 only.
It is not possible to use both modes in HLS adaptive streaming. I discovered this after a lot of testing, with the help of JW Player support and AWS support (paid).
But you may rest assured, that the HTML5 mode is a better option as support for Flash will be deprecated in the near future.
So now comes the time to arrange our Flash fall-up method as it where, namely RTMP streaming for those desktop browsers which have Flash enabled and don’t support HLS in HTML5 mode.
Setting up RTMP streaming
For this, we need two things: An mp4 version of your video and a CloudFront streaming distribution.
The video should be encoded with H2.64 with a constant bitrate, ideally a resolution of 1280×720 and AAC audio codec, bitrate 160Kbs, stereo. Here is a tutorial to convert a master video with HandBrake which guarantees that it will stream properly on AWS: How to encode a video for web, iPhone, iPad, iPod and other handheld devices using HandBrake (opens in a new tab).
Uploading the video and set the permissions
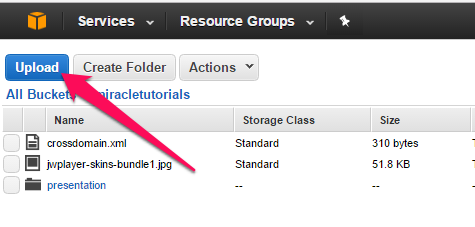
Once you have your video encoded for RTMP streaming, upload it to your bucket via Services >S3. Then select your bucket.
Incidentally, you actually don’t need to upload it in the same bucket as the one with the HLS video segments. In fact, it is often better to store RTMP streaming video in another bucket. For example, you may want one day to make the RTMP streaming distribution private, while keeping the HLS streaming public. Secondly, it is better for organizational reasons. I’m going to place them in the same bucket for now.
Click the Upload button and in the upload panel click the Add Files (1) link:
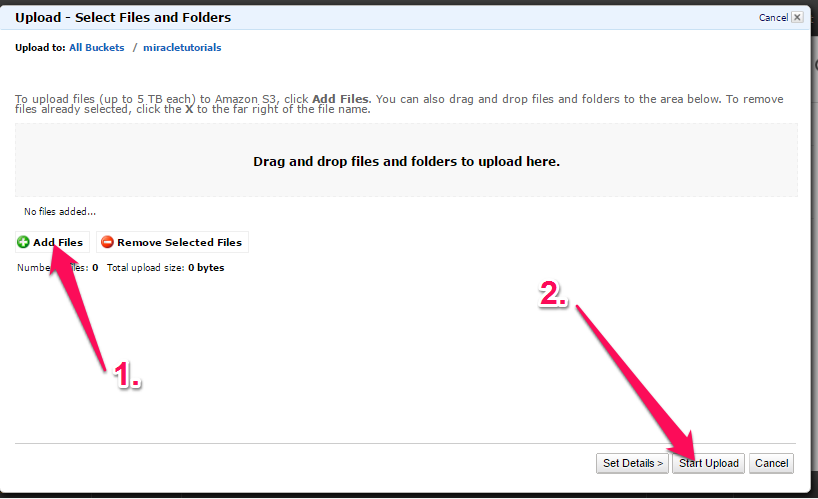
Locate your video and click on the Start Upload button (2). Depending on the weight (MB’s), this may take a while:
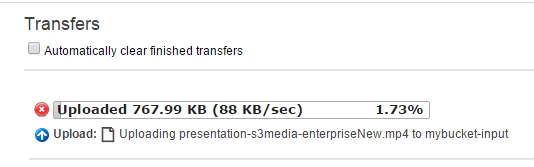
Don’t navigate away from the page until it is done, although you can do other stuff on your computer in the meanwhile.
Once the video is uploaded, it is automatically listed on the left. This video needs to be public, just like your HLS video segments. Therefore, select the video on the left, select Properties (the same as you did for the bucket).
Now you see all Property options. To make the video public, select Permissions and Add more permissions (1):
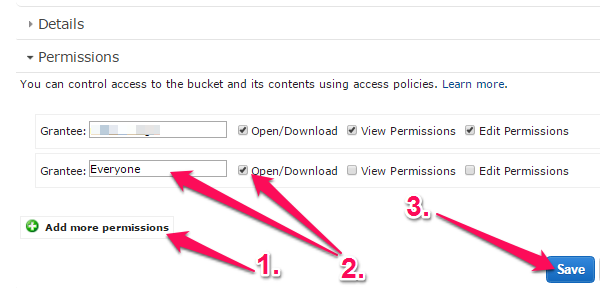
Select Everyone from the drop down list (2) and select Open/download, nothing else.
Finally, click the blue Save button (3).
The last preparation before embedding is to create a CloudFront streaming distribution.
Create a CloudFront RTMP streaming distribution
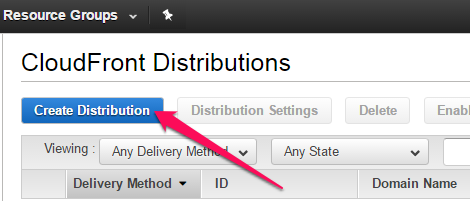
Go to Services and select CloudFront. Then click the blue Create Distribution button:
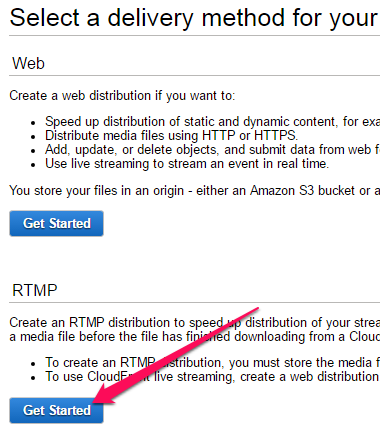
This time we select the RTMP streaming distribution:
This opens the streaming distributions options. For a public streaming distribution we only need to set 2 things:
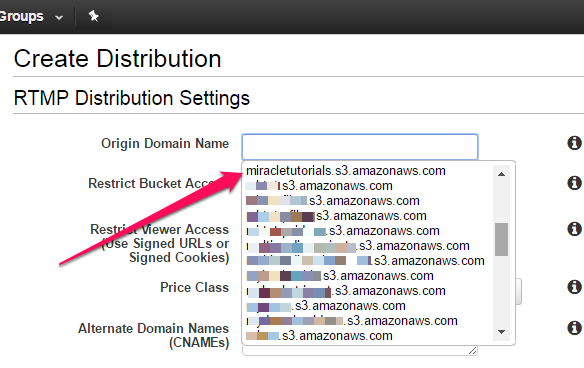
The first is the Origin Domain name. When you click in that field, it shows the list with buckets you have. Select the one you need. If you uploaded the RTMP version of your video in another bucket, then the streaming distribution should be created there.
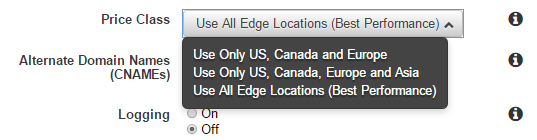
The next thing we need to check is the Price Class (1):
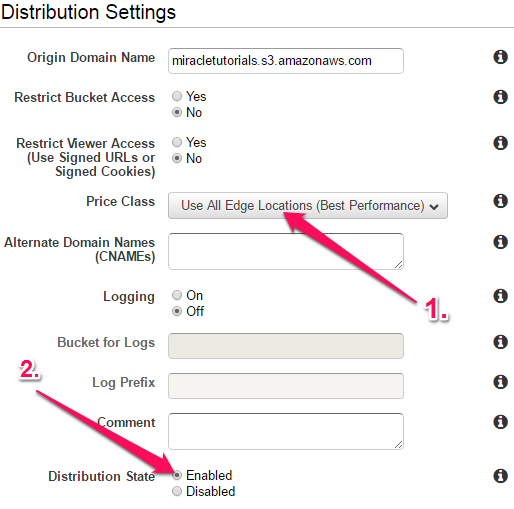
It is generally best to leave that to Use All Edge Locations because that guarantees best performance worldwide.
However, you can test with the following regions if you like:
Finally, make sure Distribution state (2) is set to Enabled (the default).
The rest you can leave alone. click the blue Create distribution button on the right bottom and we are done with the RTMP settings. It will take around 20 to 25 minutes before the distribution is deployed.
We finally embed our HLS and RTMP streaming video with JW Player which is covered in the next tutorial:
RTMP with HLS adaptive streaming video fall-back on AWS – Part 2