In this article, I’ll show you how to switch automatically from a low resolution video to HD video on your site. Standard, the low resolution version will play and when the visitor hits the full screen button, the HD video takes over. HD switching can work on any site, whether it is a WordPress, Joomla, Drupal or even a regular html site. But first I have to explain the benefits of this technique:
HD video versus Standard video
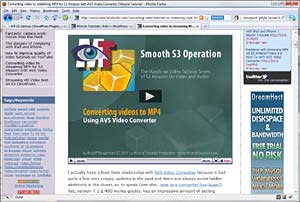 Standard video gives an excellent result when you play it within your page. With standard, I mean videos of 620×480 or smaller, like you see in the screen shot on the left. On the other side of the scale, HD video is best played full screen. You can play standard video full screen too, but it looks blurry and you get artifacts while HD video (1280×720) remains crisp and clear.
Likewise, you can play HD video within the page but that means wasting bandwidth, because it will not look better then a standard video, yet you consume megabytes like hell. In short, you are wasting resources for nothing.
So, the ideal is to show standard video when played within the page and HD video when shown full screen. That way, you can be assured of top quality in both circumstances. When the connection is bad and the HD video begins to stutter, the visitor can switch back to the low resolution version by pressing ESC (Escape). There is only one disadvantage: when you switch, the video plays from the beginning again, unless you use streaming video. With streaming, the video picks up where it left off previously.
In this tutorial we are not going to bother with streaming yet. We will do that in the next tutorial. Let us first concentrate on how to accomplish this magical trick:
With a little help from JW mediaplayer
First of all, you need to download JW player from Longtail Video. Keep in mind that if you have a commercial site or you display ads on your site, you need to buy the commercial license.
Once you have downloaded JW player, you have to upload it to your domain via FTP. For this, you can use an application like FileZilla. Here is a video tutorial on how to install FileZilla and upload files. This tutorial is also available in the Member Area. If you know already how to work with FTP, proceed below:
Upload the files
Best create a folder in the root of your domain, meaning http://www.yourdomain.com/newfolder where http://www.yourdomain.com/ is the root and newfolder could be jwplayer. Thus you get: http://www.yourdomain.com/jwplayer
Now you only need to upload the following files:
- player.swf (in the commercial license player-licensed.swf)
- jwplayer.js
- yt.swf
The rest are sample files. You will not need swfobject.js because we are going to make use of jwplayer.js which supports seamless failover between the Flash and HTML5 mode. This tech speak means: if a device or browser does not understand Flash but supports HTML5, the flash player is disregarded and HTML5 scripting is used instead to display the video. For example: when playing the video on iPad, the scripting switches to HTML5 mode and plays the video that way.
Why not using HTML5 from the start? Because it is very primitive at this time of writing. Many perks from Flash will not work, like:
- Subtitles/Closed captions (for the hearing impaired and translations)
- Logo/watermark
- poster image( iPad OS 3)
- Playlists (add buttons referring to other pages)
- Start, Duration (useful to start further up in a video)
- Jumping in the time line (random seek)
- …
and not every browser supports HTML5 yet, so we only switch when we really have to.
Create the videos
Now, you need to create two versions of your video. Currently, the best standard is MP4. I presume you have already a HD version of your video, whatever the format. Here is a tutorial how to convert video to MP4.
Depending on the size of your web pages, you will have to create a smaller version of your video to play as the standard in your page. In most cases, it won’t be bigger then 620 wide. I would actually advice not to make it bigger then 600 wide so that the video is light enough to play without hick ups.
Where to put the videos?
You could play them from your domain, but it might become a costly affair if you get a lot of visitors and the playback might become jerky. A cheap and reliable solution is S3 Amazon. If you do not know what kind of service that is, here is an introduction to S3 amazon.
OK, as soon as we have two versions of our video, we upload them. To keep it simple for now: let’s presume that you do not see the advantages of S3 Amazon and upload then to your own domain. So, we have now http://www.yourdomain.com/videos/myvideo-lowres.mp4 and http://www.yourdomain.com/videos/myvideo-hd.mp4. Whatever names you use for your videos, remember them or write it down. We will need those URLs very soon.
Embed the player code
Below you find a nightmarish piece of code, but you only need to copy and paste this and change just a couple of things. Trust me, there is nothing to it, even if you never touched a piece of code in your life!
<script “text/javascript” src=”http://www.yourdomain.com/jwplayer/jwplayer.js”></script>
<div id=”myvideo”>Load the player…</div>
<script type=”text/javascript”>
<!–
jwplayer(‘myvideo’).setup({
‘flashplayer’: ‘http://www.yourdomain.com/jwplayer/player.swf’,
‘wmode’: ‘transparent’,
‘allowscriptaccess’: ‘always’,
‘allownetworking’: ‘all’,
‘file’: ‘http://www.yourdomain.com/videos/myvideo-lowres.mp4′,
‘width’: 600, ‘height’:500,
‘allowfullscreen’: ‘true’,
‘controlbar’: ‘bottom’,
‘plugins’:{ ‘hd{ file: ‘http://www.yourdomain.com/videos/myvideo-hd.mp4′,
‘fullscreen’: ‘true’}
}
});
Copy the code above and paste it into a text document like notepad (Win) or Simple Text (Mac). Do not use a regular text editor because it adds formatting code. A html editor is fine, though. When you have done that, pay attention to the bold red parts below, the rest you will leave as is:
<script type=“text/javascript” src=“http://www.yourdomain.com/jwplayer/jwplayer.js”></script>
<div id=”myvideo”>Load the player…</div>
<script type=”text/javascript”>
<!–
jwplayer(‘myvideo’).setup({
‘flashplayer’: ‘http://www.yourdomain.com/jwplayer/player.swf’,
‘wmode’: ‘transparent’,
‘allowscriptaccess’: ‘always’,
‘allownetworking’: ‘all’,
‘file’: ‘http://www.yourdomain.com/videos/myvideo-lowres.mp4‘,
‘width’: 600, ‘height’:500,
‘allowfullscreen’: ‘true’,
‘controlbar’: ‘bottom’,
‘plugins’:{ ‘hd{ file: ‘http://www.yourdomain.com/videos/myvideo-hd.mp4‘,
‘fullscreen’: ‘true’}
}
});
//–>
</script>
There are six settings that need to match your particular situation. Let me break that down for you:
<script type=“text/javascript” src=“http://www.yourdomain.com/jwplayer/jwplayer.js”></script>
Here the bold part needs to reflect your domain name and the folder you named earlier on where you uploaded the JW mediaplayer files. If you did not call it jwplayer, change it to whatever you called it.
Normally, this line of code should go in the header of html page but you can put it directly in the content part of the page (body) as long as you only show one video on your page. For now, just change the red bold part.
Then: ‘flashplayer’: ‘http://www.yourdomain.com/jwplayer/player.swf’,
Again, you may have to change the folder name if it is different. Also, if you bought the commercial license, change player.swf into player-licensed.swf.
Width and height are the dimensions of the low resolution video, in other words, how big the video shows up in your page: ‘width’: 600, ‘height’:500,
Set it in accordance with your situation.
Next point is the file name of the low resolution video:
‘file’: ‘http://www.yourdomain.com/videos/myvideo-lowres.mp4‘,
This is the full path to your video.
And finally we get to the core of our magic trick:
plugins:{
hd {‘file’:’ http://www.yourdomain.com/videos/myvideo-hd.mp4‘,
‘fullscreen’: ‘true’}
}
This line of code makes it possible to switch to the HD version of your video as soon as the visitor hits the full screen button on the control bar of the player. When they press ESC (Escape), the player switches back to the low resolution version. This is possible thanks to an Add-on called HD which works with the player.
You read all about that Add-on here. You do not need to install it separately, it is invoked with this line of code: plugins: { hd{……} }
There are other plugins as well, but that is beyond the scope of this tutorial.
‘hd’: {‘file’: ‘http://www.yourdomain.com/videos/myvideo-hd.mp4‘, is the full path to the high resolution version of your video. Replace it with the path to your HD video.
That’s it! Now that you changed all the code to your custom situation, copy the full code from your text editor and paste it in your page. If you work with a content management system like WordPress, Joomla, Drupal, etc… make sure you paste the code in the html mode editor, not the visual editor. You can put this code either before, after or in the middle of text content if you want.
And here is a working example
Below you find a working example of this technique. Start the video and switch to full screen by clicking the full screen button on the right of the control bar:
Here I added the following line of code to show the HD status in the video area for your convenience: ‘dock’: ‘true’,
If you leave that line of code away, the HD button will show unobtrusively in the control bar (recommended).
As you can see in this example, every time you switch the play mode, the video starts from the beginning. In the next tutorial we will show you how to avoid this by using streaming video. But here you have already an example page with the same video in streaming mode: https://www.footprintaddons.com/news-articles/38-articles/115-test-hd-switching
How to fix that will be for next week. Stay tuned!