In this tutorial, we are going to embed an HLS adaptive streaming video on a website. This tutorial is the follow up of the HLS adaptive streaming tutorial with CloudFront & JW Player, where we showed how to prepare and process videos for HLS streaming. We presume you followed that tutorial and have already processed the video segments and m3u8 manifest required to playback HLS adaptive streaming videos.
We also presume you have an AWS– and JW Player Premium account.
Embedding an HLS Adaptive Streaming video
There are various ways to accomplish embedding with JW Player.
One option is to configure a player in your JW Player account, another is to create an embedding code for your website page directly.
The first option is the easiest, but it has one caveat: you need to adapt your crossdomain.xml file and add the following line of code (in red):
<?xml version="1.0"?>
<!DOCTYPE cross-domain-policy SYSTEM "http://www.adobe.com/xml/dtds/cross-domain-policy.dtd">
<cross-domain-policy>
<site-control permitted-cross-domain-policies="all"/>
 <allow-access-from domain="*.miracletutorials.com"/>
 <allow-access-from domain="*"/>
</cross-domain-policy>
This new line of code tells the player that any domain has access to the video segments and manifests. Therefore, the player on your JW PLayer account will have access to it and as such you can use the easy embedding method. The problem is that other parties can link to your video as well, which is not always desirable unless you want the video to go viral. But this method is great to test an HLS adaptive streaming before you actually put it on your site.
The other method is a little safer, but it is more work because you need to install the JW Player in a folder on your domain and then link to it in the header of your page.
We will discuss both methods. But first we have to get the URL to the master m3u8 manifest, namely index.m3u8.
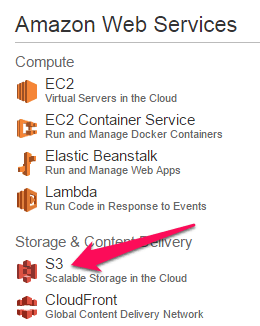
Go to the AWS console and select the S3 service:
Then select the bucket that contains the video segments. In our example, this is mybucket-hls.
When you are there, you should see something like this in the AWS console:
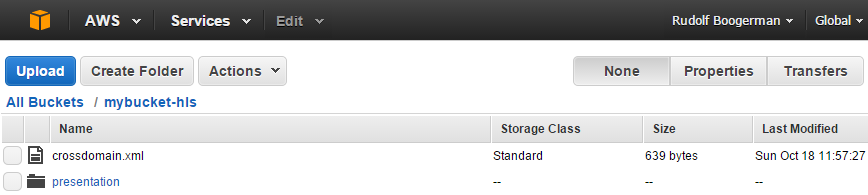
Click on the link of the folder (in this example presentation). Then you get a list of all files. Scroll down to where you find index.m3u8:
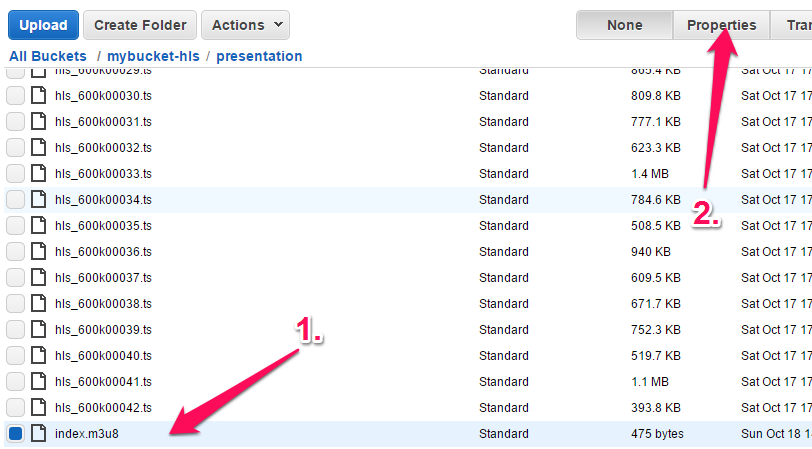
1. Click on that file to select it
2. Click the Properties button.
In the right hand panel you see the details of this file. You also find a link to the file:
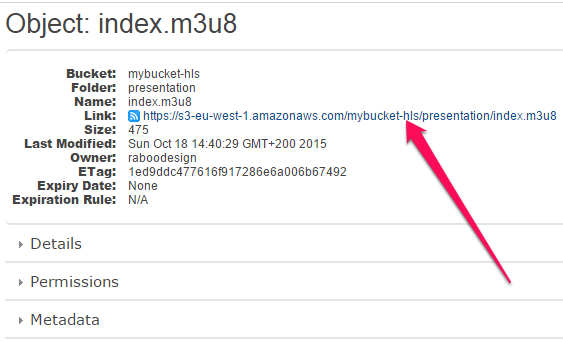
Copy the link to index.m3u8. We are now going to test HLS adaptive streaming via the JW Player account.
Embedding via JW Player account:
Note: the interface of the JW Player site changes faster then I can drop my hat, therefore screenshots may not always be up to date, but expressions generally are the same, so you shouldn’t have difficulty finding your way around.
Open a new window tab in your browser and go to https://account.jwplayer.com/sign-in and log into your account:
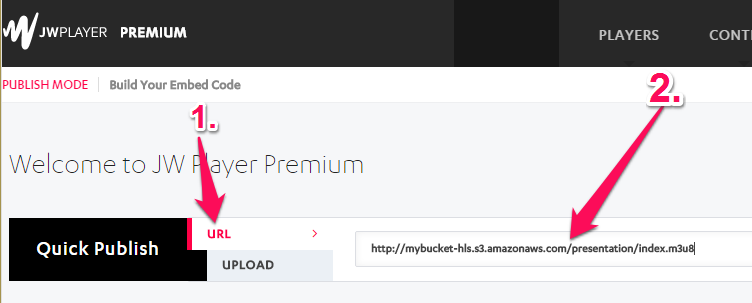
- Click the URL link.
- Paste the URL into the field next to the URL link.
Then click the Embed link:

This brings you to the Preview player. On the right, you see a player with an arrow, click on it to test your video:
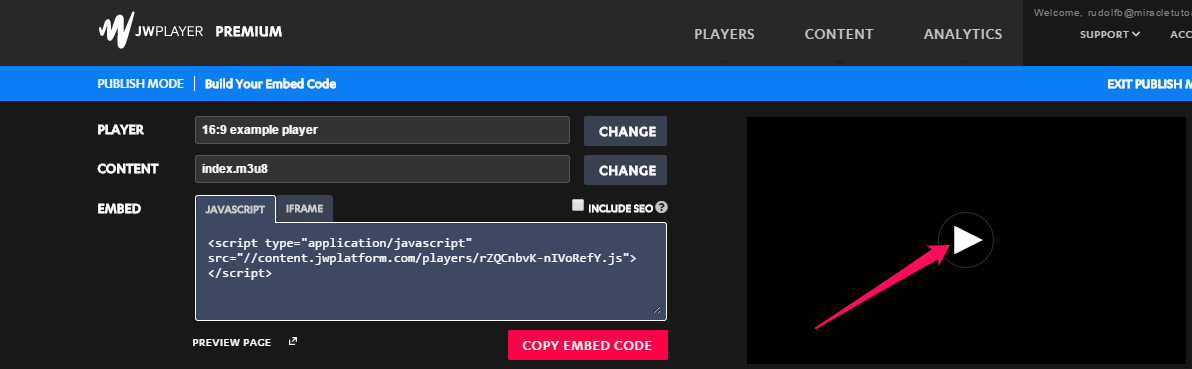
If you followed the previous tutorial to the letter, it should start to play. Click on the Preview Page link below the embedding code on the left to view the video enlarged.
If your internet connection is a little unstable, like in our case, you will see that the quality changes over time, depending on the connection speed. This is the true meaning of HLS “adaptive” streaming, since it adapts the resolution in real time, making sure the video keeps playing, no matter what (unless the connection goes beyond the minimum bitrate per second you provided).
If it doesn’t work for you, best go over the tutorial HLS adaptive streaming tutorial with CloudFront & JW Player again to see if you forgot something or made a mistake. If you can’t pinpoint the problem, we have an inexpensive HLS Adaptive Streaming Service to check and correct technical issues. You may also leave a comment below to ask questions. We are happy to help.
Placing the embedding code on your site, method 1
There two ways to embed the code in your. With WordPress, Joomla and other content management sites, the javascript option doesn’t work as this is stripped from the article/post/page as soon as you save it. But for html sites, this option works fine. Otherwise, select the iFrame tab (see screenshot above) and copy the embedding code.
Then open the page you want to display the video and paste the code in there. If in a CMS, make sure you are in text- or html mode in place of the visual editor, or it won’t work.
Save the page and view it. Find below an example video:
Although this seems to work fine at first sight, you need to set a crossdomain.xml file (to be placed in the bucket where resides the video) and set it to <allow-access-from domain=”*”/> in this case, like:
<?xml version="1.0"?>
<!DOCTYPE cross-domain-policy SYSTEM "http://www.adobe.com/xml/dtds/cross-domain-policy.dtd">
<cross-domain-policy>
<site-control permitted-cross-domain-policies="all"/>
<allow-access-from domain="*"/>
</cross-domain-policy>
Otherwise you get an error like “Crossdomain access denied“. Problem is that anyone can actually link to your video, which isn’t ideal. So, let’s move to using the standalone player method where you can set access to your domain only:
Placing Embedding using the standalone JW Player, method 2


- Copy the license key and save it in a file, you will need this to embed in the header of your page.
- Download the player and unzip it. Then use an FTP application to upload it to your domain. You may want to place the content in a folder, like mediaplayer.
Open the html page or template of your theme/template and in the header part <head></head>, place the following:
<script type='text/javascript'>jwplayer.key="YOUR_LICENSE_KEY";</script>
<script type='text/javascript' src='http://yourdomain.com/wp-content/mediaplayer/jwplayer.js'></script>
Change the red parts according to your situation. Save the file.
Open the page in html or text mode (not a visual editor mode), and embed the following:
<div id="id1">Loading the player...</div>
<script type="text/javascript">
var playerInstance = jwplayer("myElement");
playerInstance.setup({
   file: "https://s3-eu-west-1.amazonaws.com/mybucket-hls/presentation/index.m3u8",
   image: "myPoster.jpg",
   width:'100%',
   aspectratio:'16:9'
   primary:'flash',
   stretching: 'uniform',
   title: 'HLS adaptive demo'
});
 </script>
</div>
Adapt the red parts accordingly, then save the page and view it in the browser.
If you have set up your crossdomain.xml properly, like:
<?xml version="1.0"?>
<!DOCTYPE cross-domain-policy SYSTEM "http://www.adobe.com/xml/dtds/cross-domain-policy.dtd">
<cross-domain-policy>
<site-control permitted-cross-domain-policies="all"/>
<allow-access-from domain="*"/>
</cross-domain-policy>
then it should play and no one can link to your playlist that way, which avoids paying for the extra bandwidth.
As you will see, the player is now fully responsive, with no unexpected surprises.
Unfortunately, we cannot demonstrate this because we are using an older player on this site which conflicts with the above code, but you can check out our example page.
Final note: The code provided above may be deleted in Joomla, WordPress and other CMS upon saving, but there are plugins/extensions available that produce the embedding code via shortcode. At this time of writing, there is currently no JW player 7 plugin for WordPress or Joomla but this will come out soon.
Again, if it doesn’t work for you and can’t pinpoint the problem, we have an inexpensive HLS Adaptive Streaming Service to check and correct technical issues. You may also leave a comment below to ask questions. We are happy to help.
If you like this tutorial, perhaps you can share them with your friends and colleagues via the usual social media like facebook, twitter, LinkedIn or whatever platform you prefer.
i used jw player for my wordpress site but this jwplayer doesnot works for me in mobie version. Can you please help me how to make it to play in mobie version also?
Hi Ajay,
In order for mobiles to display HLS adaptive streaming, you need to add CORS headers on your web distribution.
Have a look at this tutorial: https://www.miracletutorials.com/rtmp-hls-aws-1/
It ‘s a tutorial about RTMP streaming with HLS fallback. You can forget about the RTMP part, just follow the instructions to set the CORS headers.
Warning: when you have done that, HLS streaming no longer works with the Flash plugin. So, you have to force the html5 mode by adding this in the embedding code:
primary: ‘html5’,
I hope this helps you out?
var url = ‘http://cloud.truestreamz.com/videochautari/OMXz7JWQStNy3vyaMWGJ.mp4/playlist.m3u8’;
console.log(url);
function play() {
var cnt = document.getElementById(“myElement”);
jwplayer(cnt).setup({
file: url,
autostart: false,
height: 450,
//skin: “jwplayer/skins/bekle.xml”,
image: “http://www.videochautari.com/uploads/videos/mp4/player_thumbs/OMXz7JWQStNy3vyaMWGJ.jpg”,
width: ‘100%’,
});
}
play();
Hi Ajay,
I wouldn’t set the height, but use instead aspectratio, like aspectratio: ’16:9′, (for HD) or 4:3 for standard.
For the rest everything looks OK. The issue is on the server side, you need to set CORS headers. How that works on your system, I don’t know. I only have experience with AWS.
The Above is my code and Can You please correct my Code so that it can play the video in Desktop and mobile version?
Thank In Advance
whenever i am playing vimeo videos in jwplayer7 it is showing crossdomain error
Hi himal,
Yes, that is normal. Vimeo needs its own embedding code, it doesn’t work via JW Player.