My Book and most external hard drives are set up out-of-the-box to work with Mac and PC thanks to a special format that both systems understand. As a result, you can use your external drive as a backup which you can access on both Mac and PC. This is very convenient if you are a hybrid user like me, who has the best of both worlds. But there is a limit to that format, (called FAT32), namely you cannot save files larger then 4 Gigabytes. Since High definition video (HDV) is very popular these days, 4GB is peanuts, especially if you like to keep compression to a minimum for your master videos. But I wouldn’t be writing this if there was no solution!
What is the solution?
The solution involves installing 2 pieces of free software on Mac. But let us first look at the options you have without installing additional software:
You could format MyBook or any other external hard drive either in Windows XP NTFS or Mac OS X format so that you can transfer bigger videos then 4GB. Unfortunately, by doing so, sharing large videos between PC and Mac suddenly grinds to a halt. Your external drive then becomes a slave of one or the other system. Windows cannot read the Mac OS X system, while Mac cannot read the extended NTFS format from Windows.
Yet, the solution is precisely to format your external drive from your PC to the NTFS format!
There is a slight problem, though: transfer speed.
Disadvantage of using the NTFS format for sharing
Because you have to use intermediate software that is actually optimized for compatibility and not for speed, copying files to and from your NTFS external drive via the Mac is incredibly slow. To give an example, it takes 4 hours for a video of 18GB to transfer to My Book. Now, if you really need to share this video from your Mac to your PC and vice versa, you have no other option, unless you want to cut the video into pieces of just under 4GB, which is cumbersome and slow too. In fact, transferring will probably be faster. At this time of writing, according to the developers of MacFuse, there won’t be much improvement in speed for the immediate future.
For the record, since NTFS is Windows native, transfers between PC and the NTFS formatted external drive are just fine.
Formatting the external hard drive to NTFS
To format your external drive to NTFS format, you need to use your PC because Mac cannot do this:
- On Windows, connect your external hard drive (either USB or Firewire) and wait until it is detected. Usually, you get a message saying that the drive is ready to use.
- On the desktop, double click the icon My Computer, then right click on the external drive. If it is My Book, it will be called like that. Otherwise, it could be E:, F:, depending on your configuration.
A dialog box pops up (see screen shot below):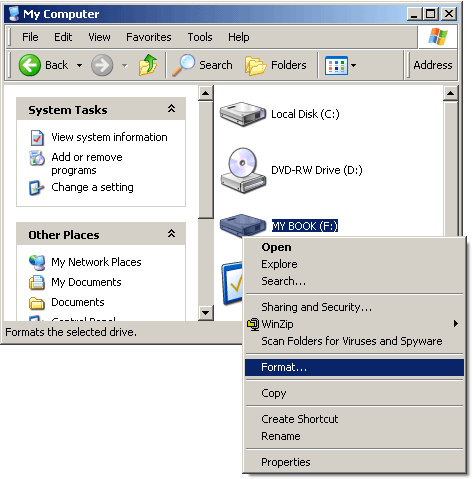
- Select Format and then:
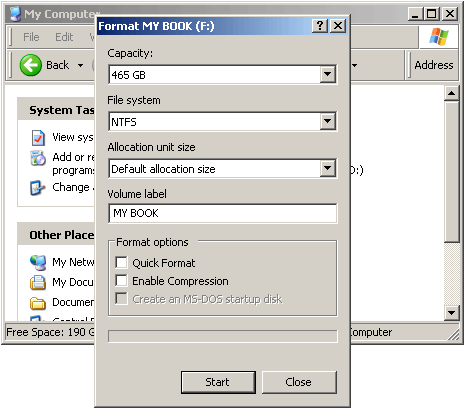
in the File system dropdown list, select NTFS. For Allocation unit size, select Default allocation size. You can change the name of the drive in Volume label if you want. Keep in mind that if the drive contains files, they will be destroyed. Best backup any files beforehand if you need them! - Then click on Start. The formatting will begin. This will take a long time. Best go do something else for at least an hour or so.
If all is well, your PC will be able to read this extended format without any problems, so the only thing we need to do now is to get it to work with the Mac. Therefore, we need to install MacFUSE on Mac, and after that, install the NTFS-3g package.
Sounds complicated? No, it is very easy if you follow the instructions below.
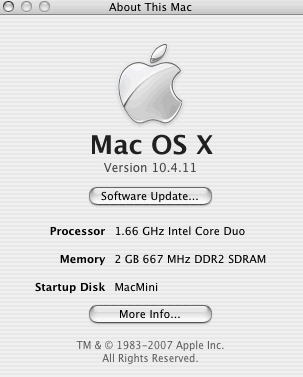
Keep in mind that this solution only works with Mac OS X version 10.4 and higher! If you do not know what version of Mac OS you have, click on the Apple logo at the top left of the menu bar, and select About This Mac. A dialog box pops up looking somewhat like this:
Instructions to install the recognition software on Mac
MacFUSE has a driver that lets Mac OSX 10.4 (and higher) understand various alien formats. There is a lot you can do with MacFUSE, but this is beyond the scope of this article. I suggest you go to http://code.google.com/p/macfuse and look for the download link on the right, under Featured Downloads. At this time of writing that is: MacFUSE-2.0.3,2.dmg
For non technical users: I would NOT try to understand the tech speak on that page and you certainly would not want to follow the demo video there, because it makes things look so complicated that you probably run away screaming your head off. Instead, just click on the download link to download the software and follow the instructions below. The software will do all the work for you, there is nothing you need to do except installing.
- After you downloaded the software: double click on the file you downloaded. It will open this box:

Now double click on the icon of MacFUSE.pkg. The install dialog box appears. It is possible that another dialog box will ask you to check the software: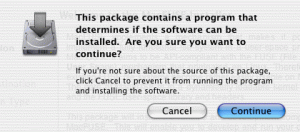
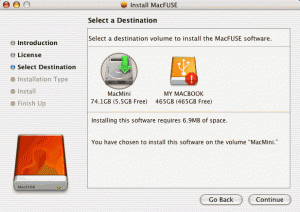
Click Continue and on the next dialog box, click Continue again to install the software. When the dialog box with hard drives comes up, make sure you select your startup hard drive - When MacFUSE is installed, restart your Mac.
- After restart, go to http://macntfs-3g.blogspot.com/ to download the NTFS-3g package for Mac OS X. Select the latest version on that page that has the word [stable] behind it. This means that is it a tested and stable version of the software. Beta versions do not always behave as expected.
- After download, double click the file you downloaded, you will see the following box:
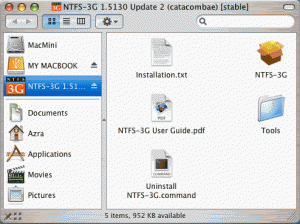
Double click the NTFS-3G icon and follow the instructions. - After install, best restart the Mac again and make sure you connect the external drive. If all is well, the drive should be detected and mounted onto your system.
If so, you will be able to backup very large videos on your external drive and share them with your PC and Mac. A dream has come true, be it perhaps a slow dream 🙂
If you have problems, go here: http://macntfs-3g.blogspot.com/ and look for Known issues.
We are not done yet! There is one very important issue related to the use of external drives:
What you need to know about external drives
You cannot unplug an external drive just like that. If you do that, chances are 50/50 that the hard drive becomes corrupt. Mac will not be able to mount an NTFS hard drive if it was not closed of properly on Windows or on the Mac itself. Mounting means connecting the hard drive with the computer. If a hard drive is not mounted, Mac will not see the drive and ignore it.
The way to avoid this problem on Windows is that you either use the little application “Safely remove hardware”, usually accessible at the bottom right of the Task bar. Right click on it and select the external drive you want to remove. It works actually the same way as with flash memory sticks, except that external hard drives are much more vulnerable.
Sometimes, you get a warning that the disk cannot be deactivated. Whatever happens, do not unplug the drive physically, unless you want to spend the next 5 to 6 hours repairing the drive and possible losing data in the process. It can help to close all applications and open windows. If that doesn’t work, close down the computer and then make sure the LED on the external drive is out before you unplug the usb or firewire cable.
On Mac it is the same thing. You press the Eject button next to the external drive in the file manager,
 or drag the drive to the trash can. Normally you can unplug the drive without problems. But if a message shows up that the drive is busy, try to close all applications and open windows, then try to unmount the drive again. If you still get the same message, shut the computer down and wait until the LED is out on the drive before unplugging.
Again: NEVER EVER unplug without proper dismounting.

From start to finish, formatting the hard drive can be a lengthy process. But what if it could be avoided? Before formatting the drive, below are some alternatives that should be tried. But what if these suggestions don’t solve the computer problem(s)? Then the drive should be formatted. However, many people format their drive without having all of the necessary software. This can be very frustrating. See Part 2 of this article to make formatting the drive a smooth process.
Great info, thank you for sharing, I have a question though, can I use the time machine app with these procedure and other back-up software for pc, alternately? Thank you!
Hi Charr,
You can do that, but as far as I know, you cannot let time machine and PC backup software talk with each other.
Another option would be to use a service like S3 Amazon. The storage space is really cheap and platform independent.
This 2010 article is full of great info, and well written, thanks.
I just bought a 3T My Book yesterday. After I reformat it for OSX 10.8.2 do you recommend I install WDC’s WD SmartWare software, or just stick with OSX’s Disk Utilities?
Additionally, can you recommend other articles on external hard drive (for mac) do’s and don’ts?
Though you have two vital concerns security and reliability for using the space you get over the web server via cloud, but the fact is these can be easily addressed. If your service provider uses the idea of Encryption method, he can simply end up securing the data that are stored and shared across the cloud. It is impossible to crack these codes of encryption by any hacker of this world.
Hi Heather,
Yes, the cloud is an option too, but it is slow if you do not have a fiber glass connection. Therefore, I only use it as a secondary backup whereby I only selected certain files which are really important.